Since my last update, I have been working almost daily on my new control
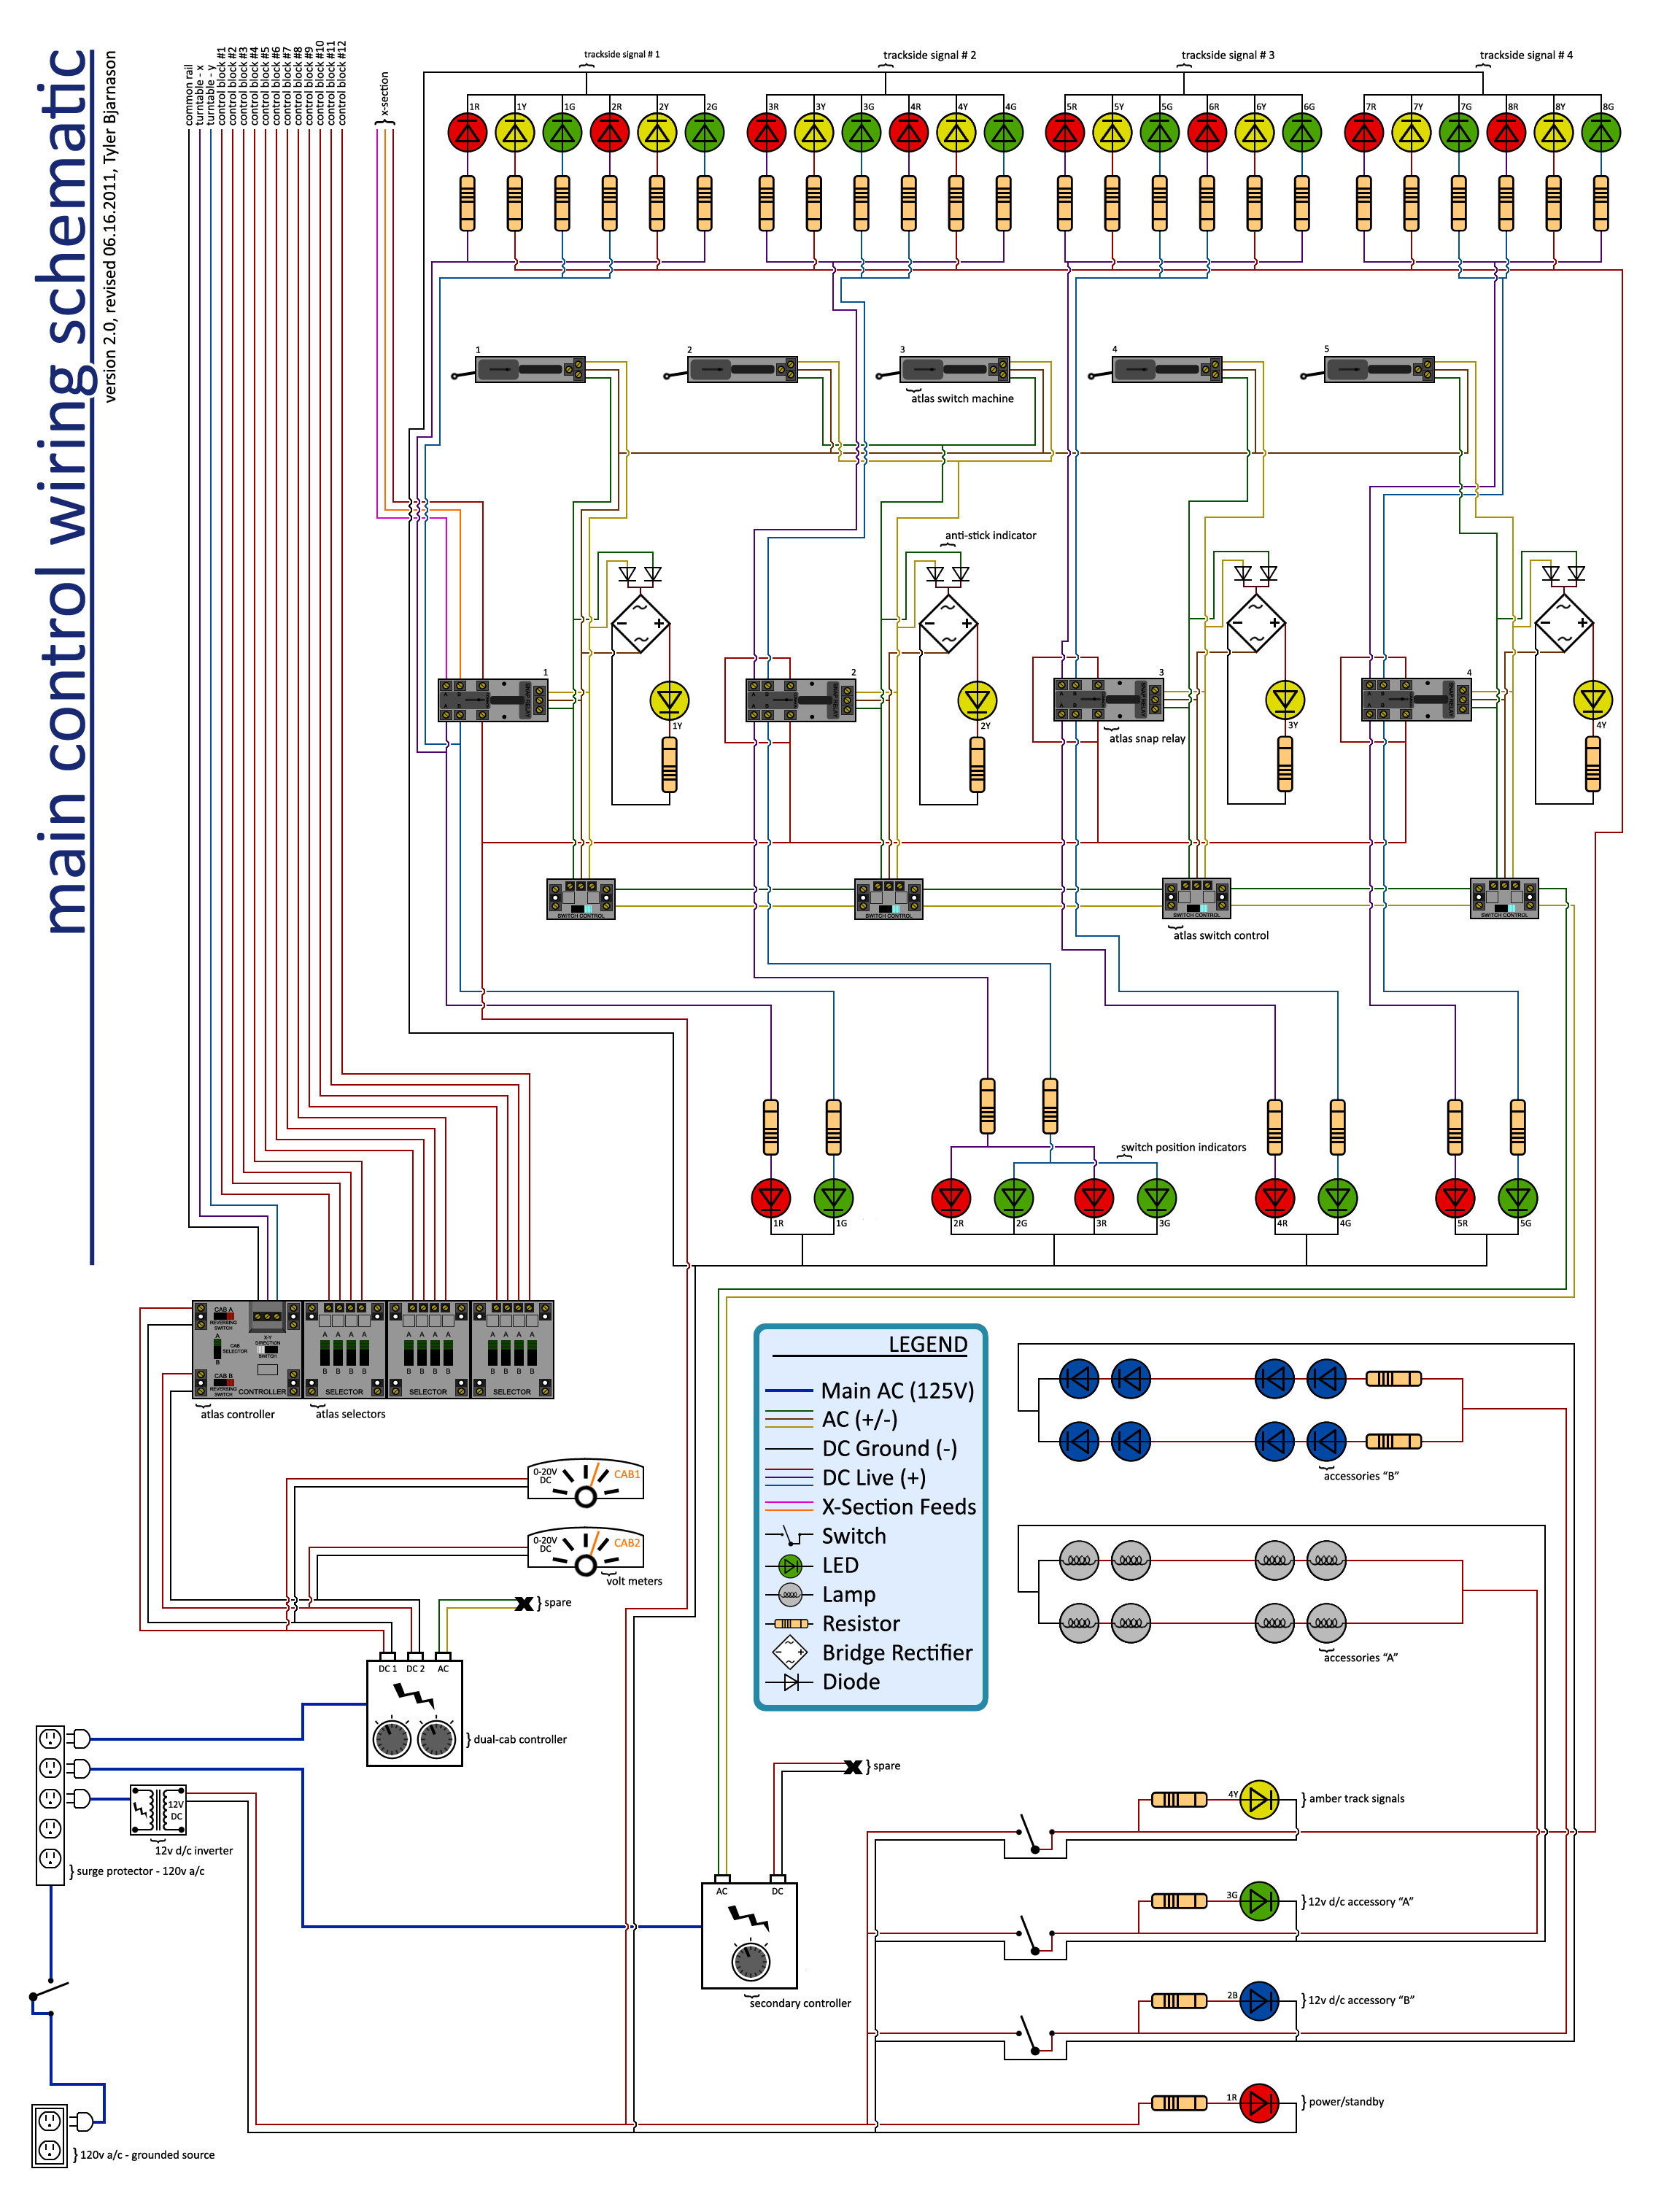
panel. I have also finished the wiring plan and schematic for all of the
switches and electronics. The plan includes the wiring for the control
panel, all lighting and signals, switch machines, power blocks, and
under-table wiring. I have been working and modifying this electrical plan
for quite some time now and though it looks quite complex, it’s actually
quite simple. It just looks like a lot because it shows absolutely every
circuit. Some of this is already wired, such as the under-table switches,
but the majority of it will be in my control panel.
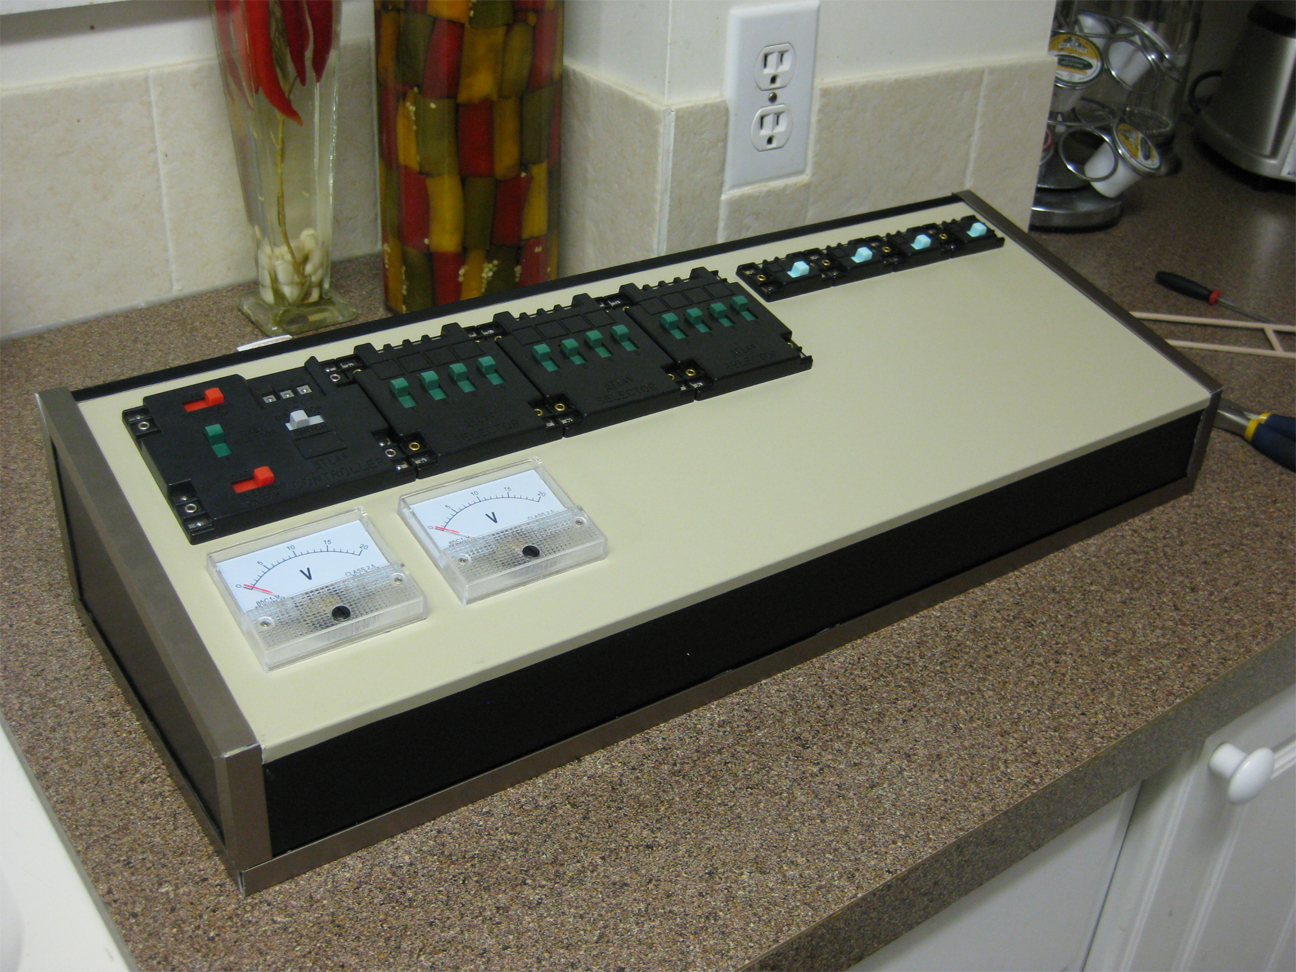
As for the control panel, it has been quite a learning experience with a
lot of trial and error, blood and frustration. In the end however, the
almost-finished product turned out pretty good.
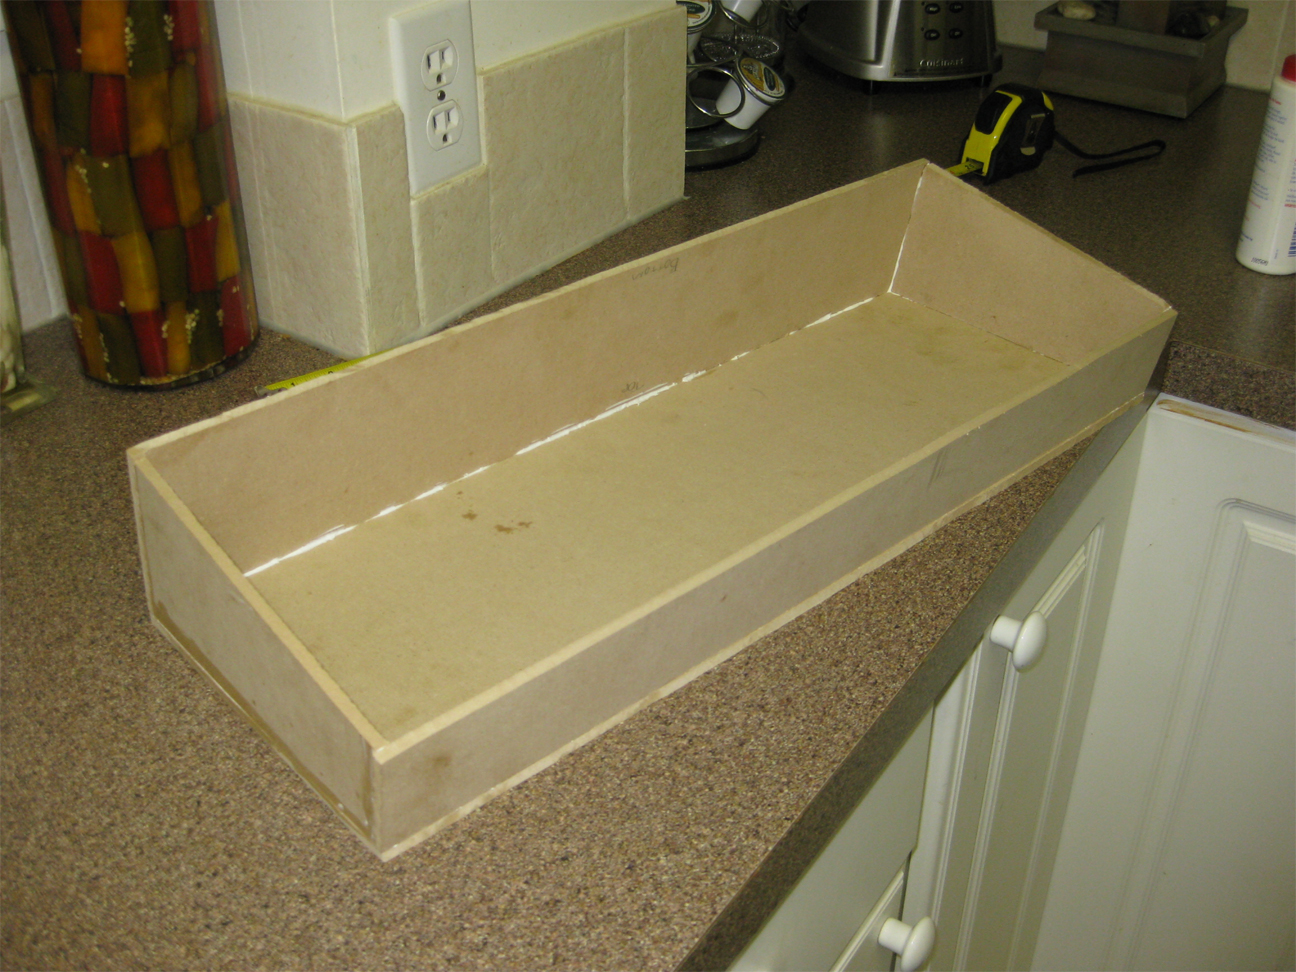
I planned the control panel to be a box-style panel, with all the lights
and switches on top and all wiring and electrical components stowed inside.
I decided to use 1/4” hardboard to construct the controller. Like always, I
first made a detailed plan on paper of what I wanted to build. This makes
things so much easier when it comes to construction. After drawing out the
panel pieces on the hardboard, I used a jigsaw to carefully cut them out. I
then glued them together with Weldbond white glue.
Once the glue had cured, I measured and cut out the holes for the voltage
meters. These meters will eventually monitor the CAB 1 and CAB 2 outputs
from my power pack. I decided to go with analog gauges instead of digital
ones for a more of a traditional look.
I was originally planning on painting my control panel, however I realized
that paint was not going to be enough to cover many of the imperfections. I
decided to cover the box with recycled black and wicker aluminum cladding
from a scrap yard. I was not able to bend the cladding well enough to cover
the box, so I cut individual pieces for all 5 sides.
Cutting holes through the cladding for the voltage meters proved to be
quite the challenge as I didn’t have the right tools to cut a perfect
circle. Instead, I used a small drill bit to drill several dozen holes
around the traced circle. I then re-drilled these holes with a larger bit
until the holes joined and the center circle fell out. With a bit of
modification and filing, it fit perfectly over the control box
holes.
Using PL Ultimate construction adhesive, I attached 1/2” steel L-molding to
the edges and corners of the panel, giving it a finished look. The finished
panel turned out better than I expected, though there are some noticeable
imperfections. At this time I also installed all of my Atlas switches on the
face of the control panel.
Next I installed the controller components onto the face of the panel using
small screws. For these, I used an Atlas Controller, three Atlas Selectors,
and four Atlas Switch Control Boxes. The Controller will allow me to reverse
direction on both CAB 1 and CAB 2, as well as select which CAB controls the
turntable. The selectors will control the twelve power blocks on my layout
and the four switch control boxes will switch the track turnouts. See the
Wiring Diagrams
page for detailed explanations of how all these components work.
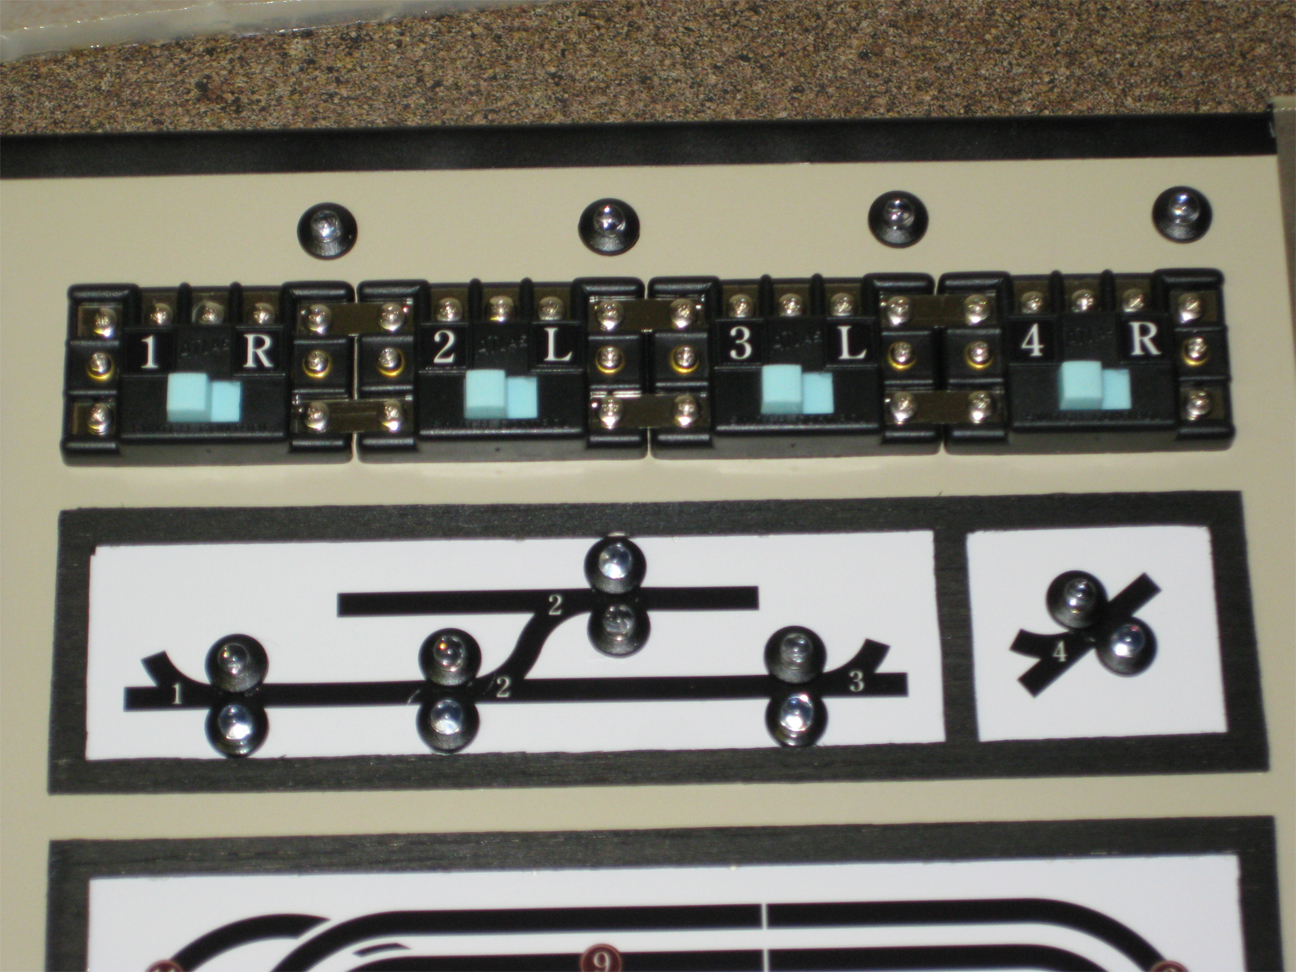
The next item for construction was the display for the turnout positions as
well as the 13 track power blocks. I decided on two separate diagrams;
one for the overall layout and one for the turnout points. This kept the
diagrams much less cluttered and easy to understand. I cut frames for each
diagram out of 1/16” craft wood board and stained it dark ebony.
For the diagrams, I used digital vector images I created in Photoshop
instead of using the traditional tape method. I printed these images on
photo paper and glued them to the back of the wood frames. I then fastened
the frames to the face of the control panel with PL Ultimate adhesive. The
numbers on the diagrams correspond to the switch numbers and the power
blocks.
Next I drilled holes through the switch position diagram and installed my
LED lights which will indicate the switch positions; red for the turnout and
green for the main line. Switches 1-3 are all for the main line yard and
switch 4 is for the turnout to the turntable. I also drilled holes for the switch and accessory indicator lights, such as
layout and power LEDs.
The yellow LEDs at the top of each Atlas switch are for switch machine
overload protection. I’ve heard that Atlas switch controls sometimes stick
and will burn out switch machines so I added this little feature that will
indicate a stuck switch. The LED will light only for the moment that the
switch is pressed. If the switch sticks, the LED will stay lit, indicating
power overload. You can see how I wired these in the wiring schematic at he
bottom of this post.
Once everything was attached, I started to label all of the Atlas
controllers, switches and selectors. The numbers that were included with the
switches didn’t fit correctly nor did they look good, so I constructed my
own in Photoshop. I opted for a black background and white text, making them
blend perfectly with the Atlas switches. Once printed, I cut out each letter and number and stuck it to each switch
using double sided tape.
I will still need to label the rocker switches and some of the other LEDs
on the control panel, but I'm pretty happy with how this turned out so far.
The next step will be all of the wiring. The control panel will eventually
be mounted to a piece of plywood with the cab controller right beside it.
The final plan is to have the entire unit fold away under my layout when not
in use.


8 comments
Hi,
ReplyDeleteJust browsing on google and found your blog. Love your design for the control panel and since I'm about ready to build one myself I've bookmarked your site for future reference.
Thank you,
Wayne
Red Lodge, Montana
Thanks for the comment! Let me know how your control panel works out. I'd love to see it.
ReplyDeletehi
ReplyDeletei would like to know if i may use your control panel design
Feel free to use anything you see on my blog for your own project. Make sure to contact me as well if you have any questions or need anything explained in more detail. Thanks.
DeleteThanks
ReplyDeleteInteressting place you've got here. Nice:-))
ReplyDeleteIt's a good place to use to inspiring me :-))
Great
David
Hi Tyler, I'm also an admirer of your layout and blog. I'd like to know how you created the graphics for the control panel in PhotoShop? Do you have the source PSD file you can share?
ReplyDeleteI'm not a novice to Photoshop but I am not a designer either, I've only used it for working with existing files.
Again, your layout is amazing and I am basing my track layout on yours. I have other plans for scenery and landscaping though.
Odisha 7th Examination Conducted by Department of School and Mass Education, Government of Odisha, Students looking for Previous years Question Paper 2023s as well. we have uploaded some Genuine Odisha Board 7th Model Paper 2023 2023 provide them a Complete idea to Prepare well before Examination and with the help of Previous years Paper 2023s, Odisha 7th Class Model Paper 2023 High School Students Searching for Odisha 7th class Previous Question Paper 2023 2023 we have Attached the past few year Paper 2023s here go through the Details and Download those Paper 2023s you want. Start your Preparation with Odisha Board to get Qualified in High School Exam with more marks, Candidates are Advised to Practice Through Odisha 7th Sample Paper 2023.
ReplyDelete