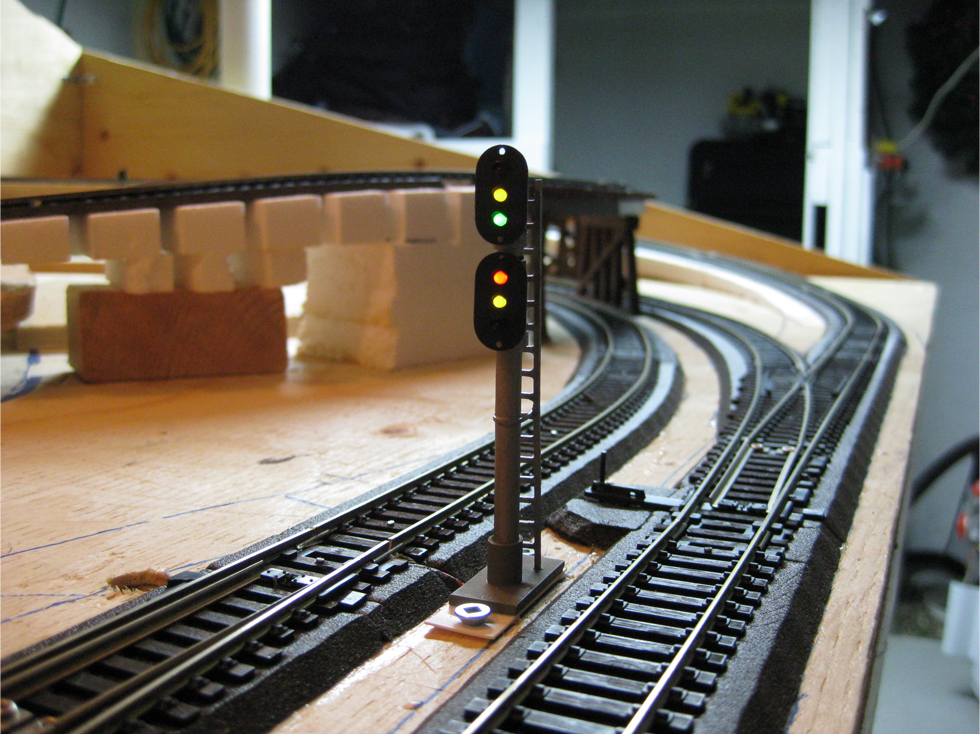
My trackside signals are finally complete! When I purchased the little
trackside signal face plates and matching LED lights off eBay last year, I
thought I was being thrifty. However, I quickly realized that I was now
faced with the responsibility of having to make the light standards to hold
these signals. Wiring was not an issue as I had incorporated these into my
main wiring system, but I now had to find a way to make them look at least
somewhat realistic on my layout.
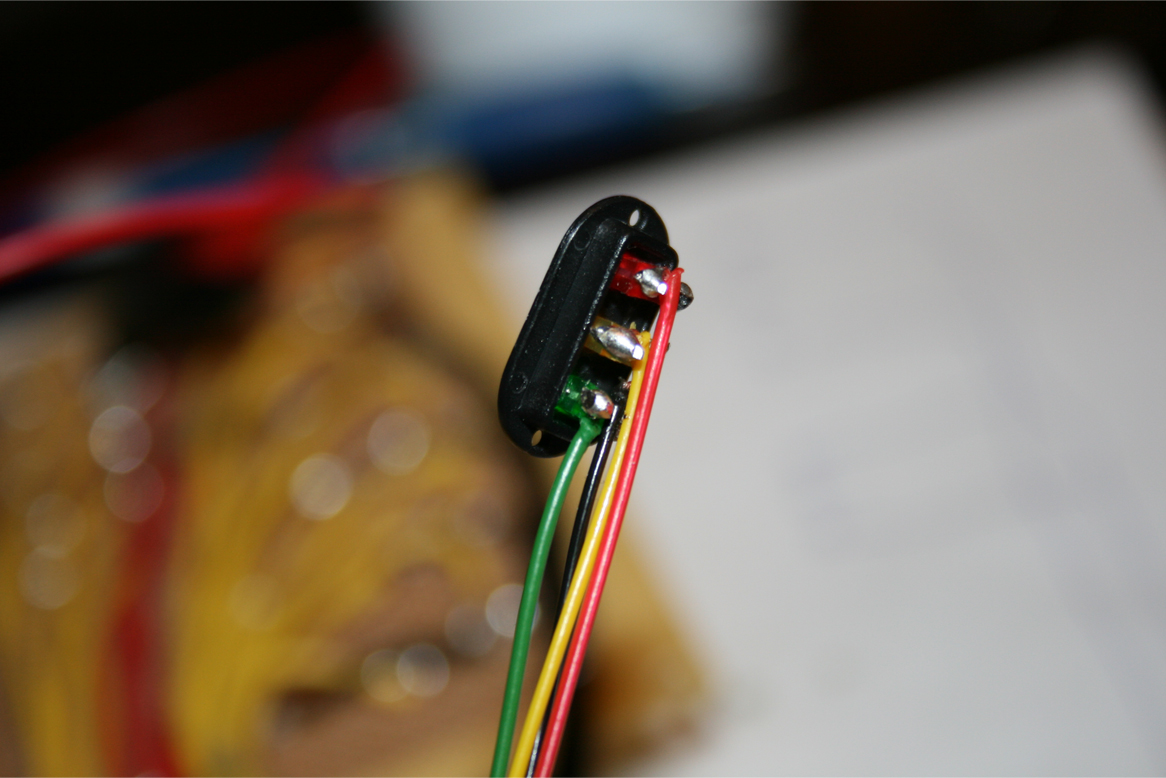
As I mentioned, the signals themselves were purchased off eBay for about
$8.00. This included 10 black signal face plates, 30 LED lights (red, green,
and yellow), and 30 corresponding resistors. Once the LED lights were glued
into the face plates, I used wire leads from stripped telephone wire that I
soldered to the contact points on the LED lights. Telephone wire works great
because it's cheap, the leads are very thing, and the leads are coloured
red, yellow, green, and black. This makes matching them up with the lights
very convenient.
To build the light standards, I went to my local hobby shop and visited the
Evergreen Models styrene plastic display. Evergreen makes bulk styrene
strips in almost every shape and size imaginable, which is great for these
types of projects. I used 3/16” tubing for the mast, which is a little
larger than most prototypical-sized masts. This was the smallest size tube
that would allow me to run the 8 wires through for the dual signals. I then
cut notches in the tops of each mast to allow the signals to fit into
them.
I used slightly larger 5/16" tubing for the base that allowed the 3/16”
tubing to fit snugly inside for the base support. The mast and support where
then glued to a styrene base. I glued small rectangular pieces of thin
styrene on the sides of each signal. This created a smooth transition from
the signal to the mast. A second smaller piece of styrene was then glued to
that, simulating a maintenance door. I used poly-filler to fill in any gaps
and to smooth out any really rough edges.
The maintenance ladders were all hand made using .04" styrene strips. I
carefully cut every rung to the exact size I needed and carefully glued them
to one of the side supports. I did this on a flat surface to ensure the
rungs were all aligned with the support and were all level and square. Once
dry, I glued them to the back of the masts. I also added a thin styrene
support bar in the middle between the ladder and mast.
I used steel coloured enamel paint for all of the metal parts, such as the
ladder and mast. I used a flat grey to simulate concrete on the base. The
signal units themselves were painted flat black on all sides. Once the paint
dried, I drilled holes through my benchwork, allowing the wires to run
through to the underside where I connected them to the rest of the wiring. I
used temporary screws to hold them in place until I start my
scenery.
The end result looked pretty good, considering I have never scratch built
anything with styrene before. The cost was a lot less as well. Signals can
run anywhere from $25 right up to $50 or $60 or higher for really nice ones.
I spent in total about $30 for all 5 of mine. I know they aren’t exactly
prototypical, but compared to some that I’ve seen in stores, I’m pretty
satisfied with how they turned out.
For a diagram of how I wired my signals, visit my
Wiring Diagrams
page.


1 comments
Directorate Of Teacher Education And State Council Of Educational Research & Training (DT & SCERT) will be Conducting the Odisha 1st, 2nd, 3rd, 4th, 5th (Primary School) Public Examination in Academic year 2023, This Odisha Primary School Final Exam Conducted Every Year Month of April, This SCERT Odisha 1st, 2nd, 3rd, 4th, 5th Exam Every Year More Than 30 Laks of Students Attended, SCERT Odisha 4th Class Model Paper DT & SCERT Odisha 1st, 2nd, 3rd, 4th, 5th Date Sheet 2023 Available at Official Website at www. www.scertodisha.nic.in Students Are you Looking for DT & SCERT Odisha 1st, 2nd, 3rd, 4th, 5th Question Paper 2023 If yes, This Web page Right Place for the Students to get the Latest Information for Public Exam 2023.
ReplyDelete