I decided that the next step of my layout would be the roads. As always, I
researched the subject online and found that the most effective method would
be to build forms and pour the roads with a plaster product. First however,
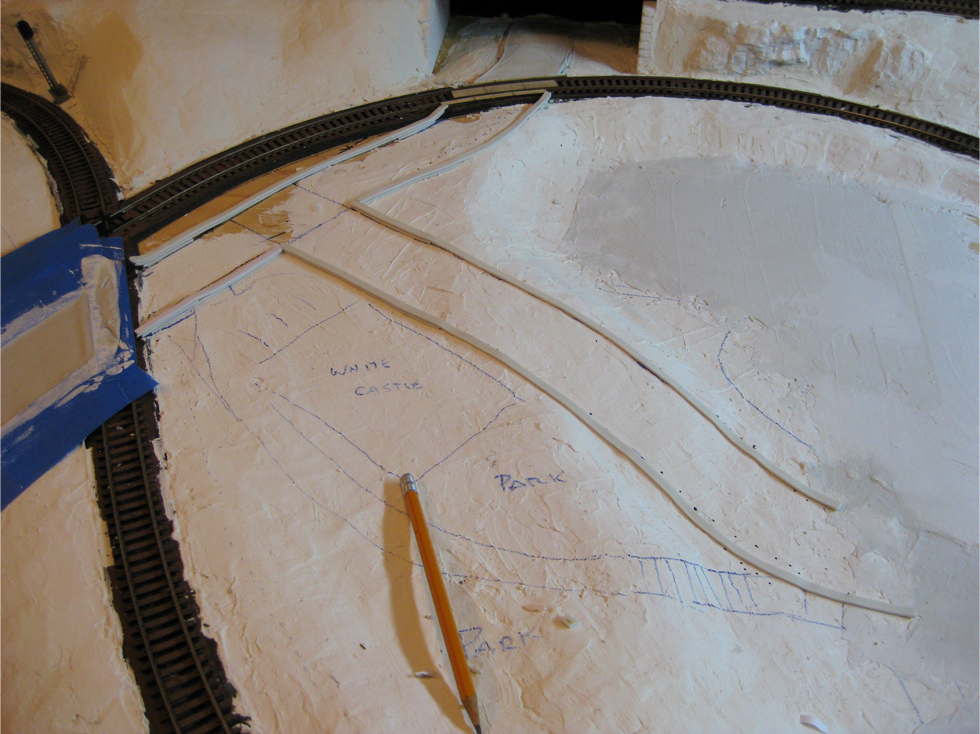
I needed to plan where my roads were going. I determined my road width at 2
1/2" and cut a square piece of cardstock the same width. After drawing the
contour of one edge of my planned road on my layout, I used the template
card to draw the opposite edge. This allowed me to ensure the road was
always the same width.
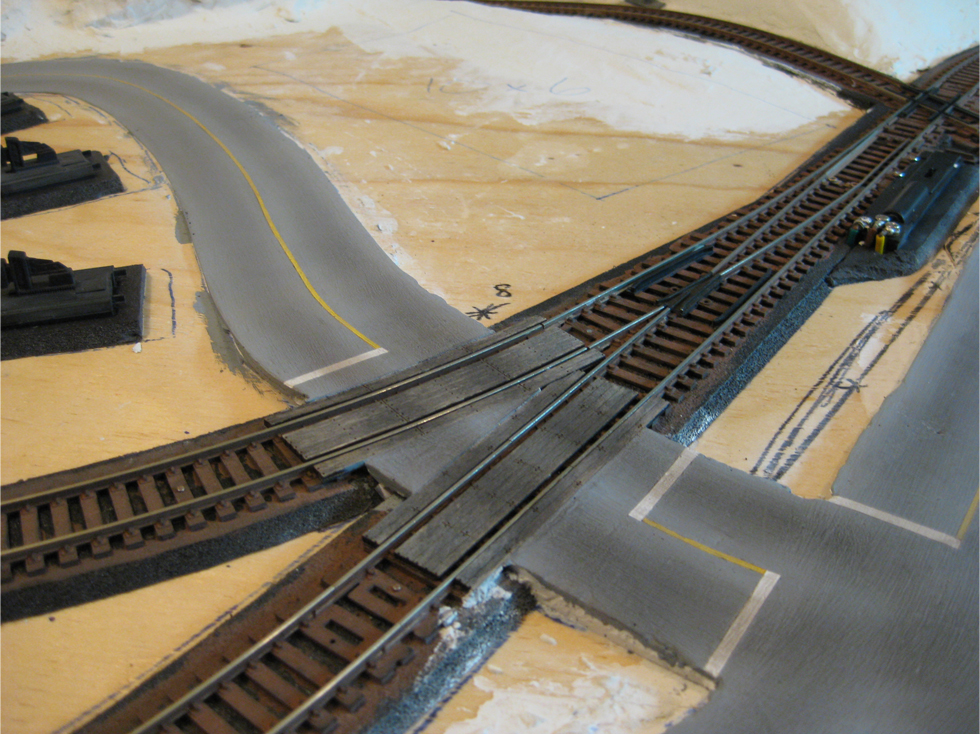
Once the outline of the road was drawn onto the layout, I installed 4 laser
cut wood grade crossings where the road crossed the track. For the road
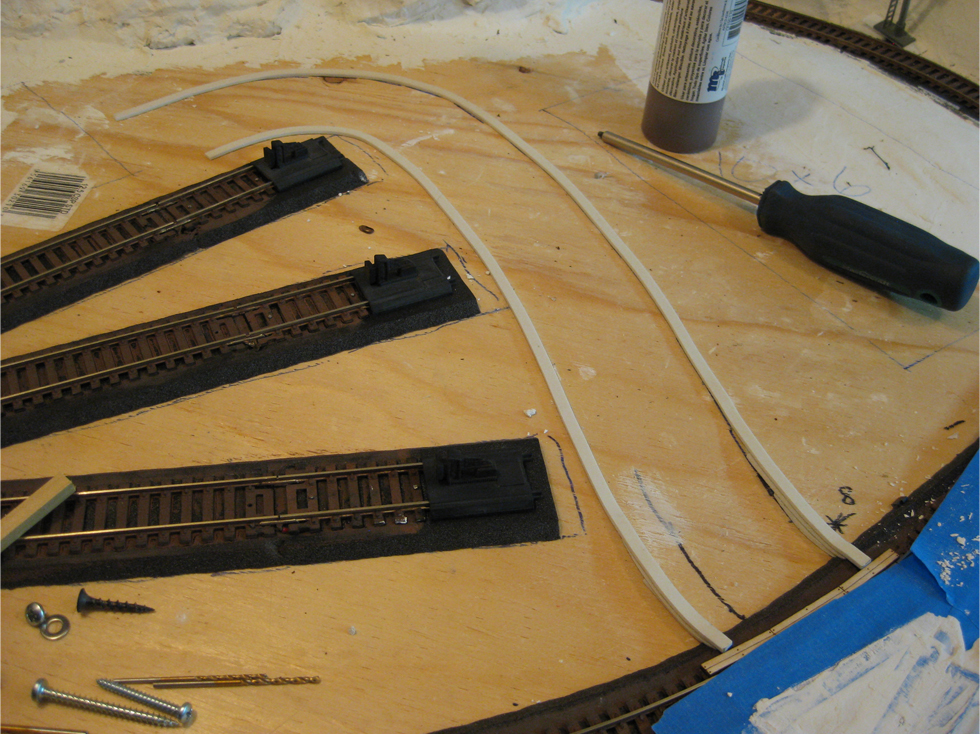
forms, I used inexpensive foam tape that I purchased from a local dollar
store. Woodland Scenics sells a similar product called Paving Tape, but it
was unavailable at the one and only hobby shop in my city.
I laid the foam tape on the outside edge of the road lines I had drawn. The
tape I used was 1/4” wide, which allowed it to be easily pliable for any
curves. Because my layout and grade crossings were not all level, I needed
to use two, three, and even four layers of foam tape in several areas to
allow the surface level of my road to be as level as possible. For a smooth
transition between the different levels of foam tape, I always made sure the
very top layer of foam tape was continuous rather than being stepped. This
is very important when it comes to smoothing the top of the road.
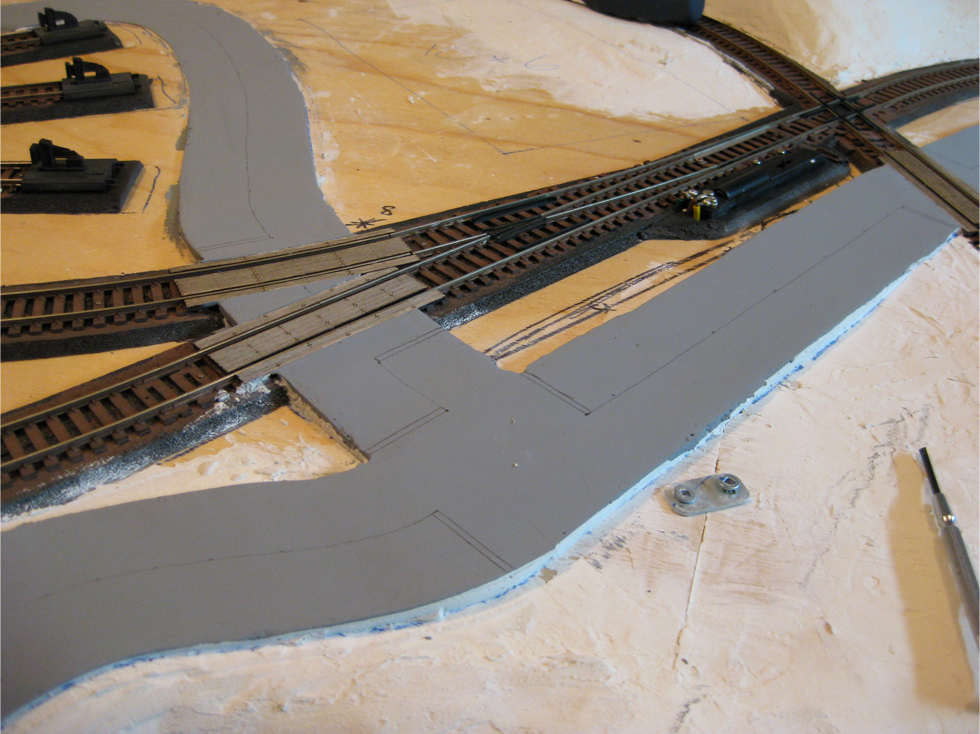
For the road material, I used Woodland Scenics Smooth-It, a special dry-mix
plaster product specifically designed for building roads and other smooth
surfaces. I mixed the Smooth-It powder with water until it was the
consistency of cake mix. Working in small sections, I slowly poured the mix
between the forms, spreading and leveling it with the top of the foam tape
forms using a wide piece of styrene. I made sure I masked the top of the
wood grade crossings with masking tape. That way I could easily level the
roadway with the top of the crossings.
After the first layer of Smooth-It had dried overnight, I applied a second
thin layer, smoothing over any imperfections in the first layer and making
sure the road was as smooth and level as possible. Once the second layer was
completely dry, I carefully removed the foam tape forms. The roads were
pretty smooth but needed further sanding to improve the surface and remove
rough edges.
Using 200 grit sandpaper, I sanded the road surface until I was satisfied
with the smoothness. After I vacuumed all the dust off of the roads, I
noticed some areas of my road looked bubbly, similar to the inside of an
Aero chocolate bar. This was caused by mixing my Smooth-It too thin when I
poured it. If you do mix it too thin, add more Smooth-It powder and stir
until the bubbles disappear and let it sit for a few minutes prior to
applying. To fill the air holes in the road, I simply added a thin layer of
Smooth-It on top, making sure to press it into all the holes.
I used three coats of gray acrylic paint for the road colour. I also
coloured the wood grade crossings with India ink diluted with water. Once
the gray paint had dried, I marked a center line on the roads with a pencil,
using the center line on the same cardstock template I used before to
measure the road widths. These lines would be a guide for the center line
markings. I also marked out stop lines using the same method.
I masked the stop lines first and painted them with white acrylic paint.
Once they were completely dry, I masked the center lines. To do this, I took
blue painters tape and applied the required length to a piece of glass. I
then cut the straight edge of the tape about 1/8” wide to make long, narrow
strips. I peeled the narrow strips off the glass and very carefully applied
it to the road, following the contour of the center line I previously
marked. I also ensured the straight edge of the tape was always facing to
the inside.
I found that starting at one end of the road and only sticking down 1/4 -
1/2” of the masking tape strip at a time worked best for getting smooth,
straight lines. For curves, I found that holding the tape down with one
thumb and positioning 1/4” of masking tape at a time with my other hand
worked best. I then did the same with the second strip of masking tape,
ensuring the space between the two strips was as equally spaced as
possible.
I painted the lines with three coats of yellow acrylic paint. I then
carefully removed the blue masking tape strips. Some small patches of the
gray base coat did lift with the tape, which I easily touched up. Just make
sure you save some of your original road colour if it's a custom mix! I
found working in sections and not leaving the tape any longer than 20
minutes on the road greatly reduced the amount of paint that came up. Also
removing the tape on a sharp angle helped, opposed to lifting in straight
up.
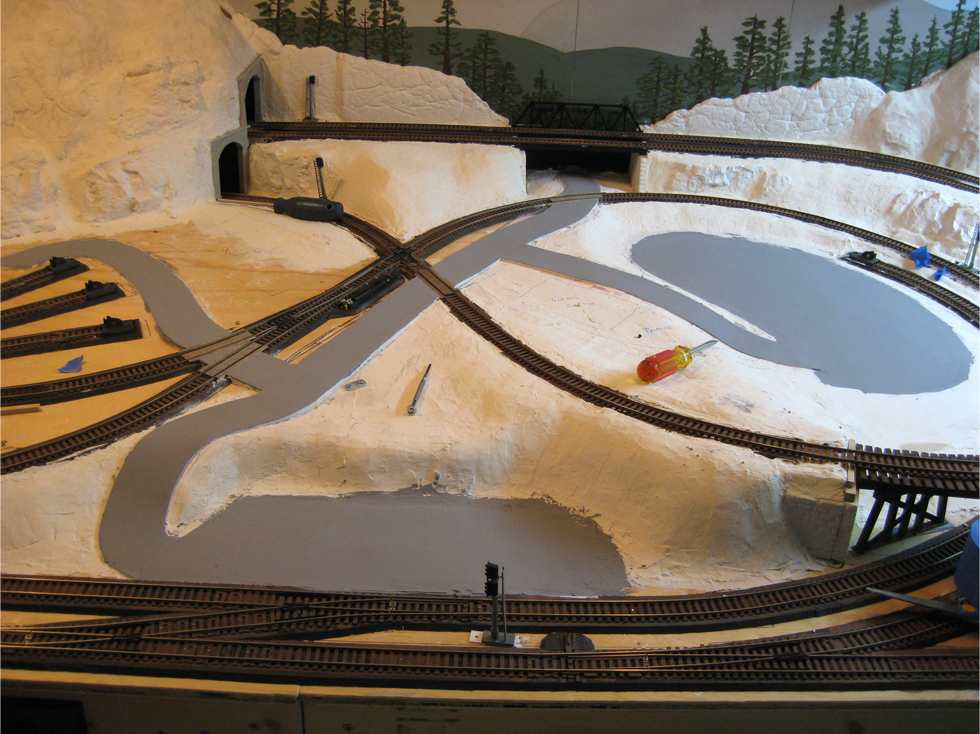
My roads were now complete, but looked a little too perfect and clean. To
add some weathering and usage effects, I sprinkled a very small amount of
black pastel dust down the center of each lane and smeared it with my
finger. I used the same effect on the grade crossings as well. Signage and
other small details will come later, but the main roadways are now complete
and ready to serve the various areas of my layout.








3 comments
Hello Ty, my name is Travis Getz and I have been working on a model town on-and-off for around 9 years now.
ReplyDeleteI always told myself I would do a blog or a book one day, so everything was photographed digitally along the way. Then some bad sectors on some hard drives erased many of the photos!
Anyway, I just wanted to let you know I really enjoy your blog and congratulate you on getting everything online and sharing your techniques with everyone. I have learned a lot from it, the wiring diagram and trick about dirtying the roads were both great.
Well, all the best and keep up the great work... --T
what is the name of the foam tape that you bought from the dollar store?
ReplyDeleteNCERT 11th Chemistry Solutions 2023 2021 Pdf Chapter Wise Helps Students Prepare and eventually adjust to the Increased load of Chapters and Topics, by Clearing their Doubts from the very basics. NCERT 11th Class Solutions 2023 for Chemistry NCERT Chemistry Solutions 2023 2021 for Class XI Providing the Download Latest Edition you can Download Pdf Format. NCERT Solutions 2023 2021 for Class 11 are Prepared by Subject Experts, Solutions 2023 are prepared detailed, step by step for all Questions 2023 in Text Book Solutions 2023 for quick Understanding and easy access. NCERT 11th Class Chemistry Books Solutions 2023 2021 for English, Hindi, Urdu Medium.
ReplyDelete