Traffic Lights Part I - Light Standards
By Ty’s Model Railroad - 7/07/2012 06:20:00 PM
The same day I was putting the final touches on my Northern Light &
Power kit, my little box full of green, yellow, and red 2mm LED lights
arrived in my mailbox from eBay. It was now time for my next project:
traffic lights! I have two ‘T’ intersections on my layout, both of which I
wanted to be controlled with traffic lights. I wasn’t satisfied with many of
the commercially available light systems that are available in my area as
most were unrealistic and far out of scale, not to mention expensive. The
ones I did like wouldn’t fit correctly on my roads as I had built them quite
narrow narrow.
Faced with the issue of cost and adaptability, I decided to attempt my hand
at building my own traffic lights. I had previously built my own
track side signals
so I figured traffic lights would be quite similar. My model street lights
are based on a common North American style with a curved light standard
which holds the traffic lights horizontally over each lane of traffic.
I started by cutting the face plate for each traffic light from thin
styrene sheet. I then carefully drilled 3 – 2mm holes in each face plate,
spacing each hole 1/8” apart (center to center). For the lens shades, I used
a single hole punch to punch out round pieces from very thin styrene. I cut
the styrene disk back 2mm from its edge, trimmed each pointy edge, and
shaped each piece by gently rolling it between my fingers until it had the
correct curve to fit over each LED hole in the face plate. I was able to
make 2 shades from each styrene disk. I then glued 3 of these directly above
each hole on the face plate.
I masked the backside of each face plate and sprayed the front flat back as
it would probably be easier to paint these prior to installing the lights. I
masked the back side to prevent paint from getting on this area which would
cause issues when gluing on the LED lights. I then counted out 6 LED lights
in each colour (red, yellow, green) and tested each one with a resistor and
power supply to ensure each one worked.
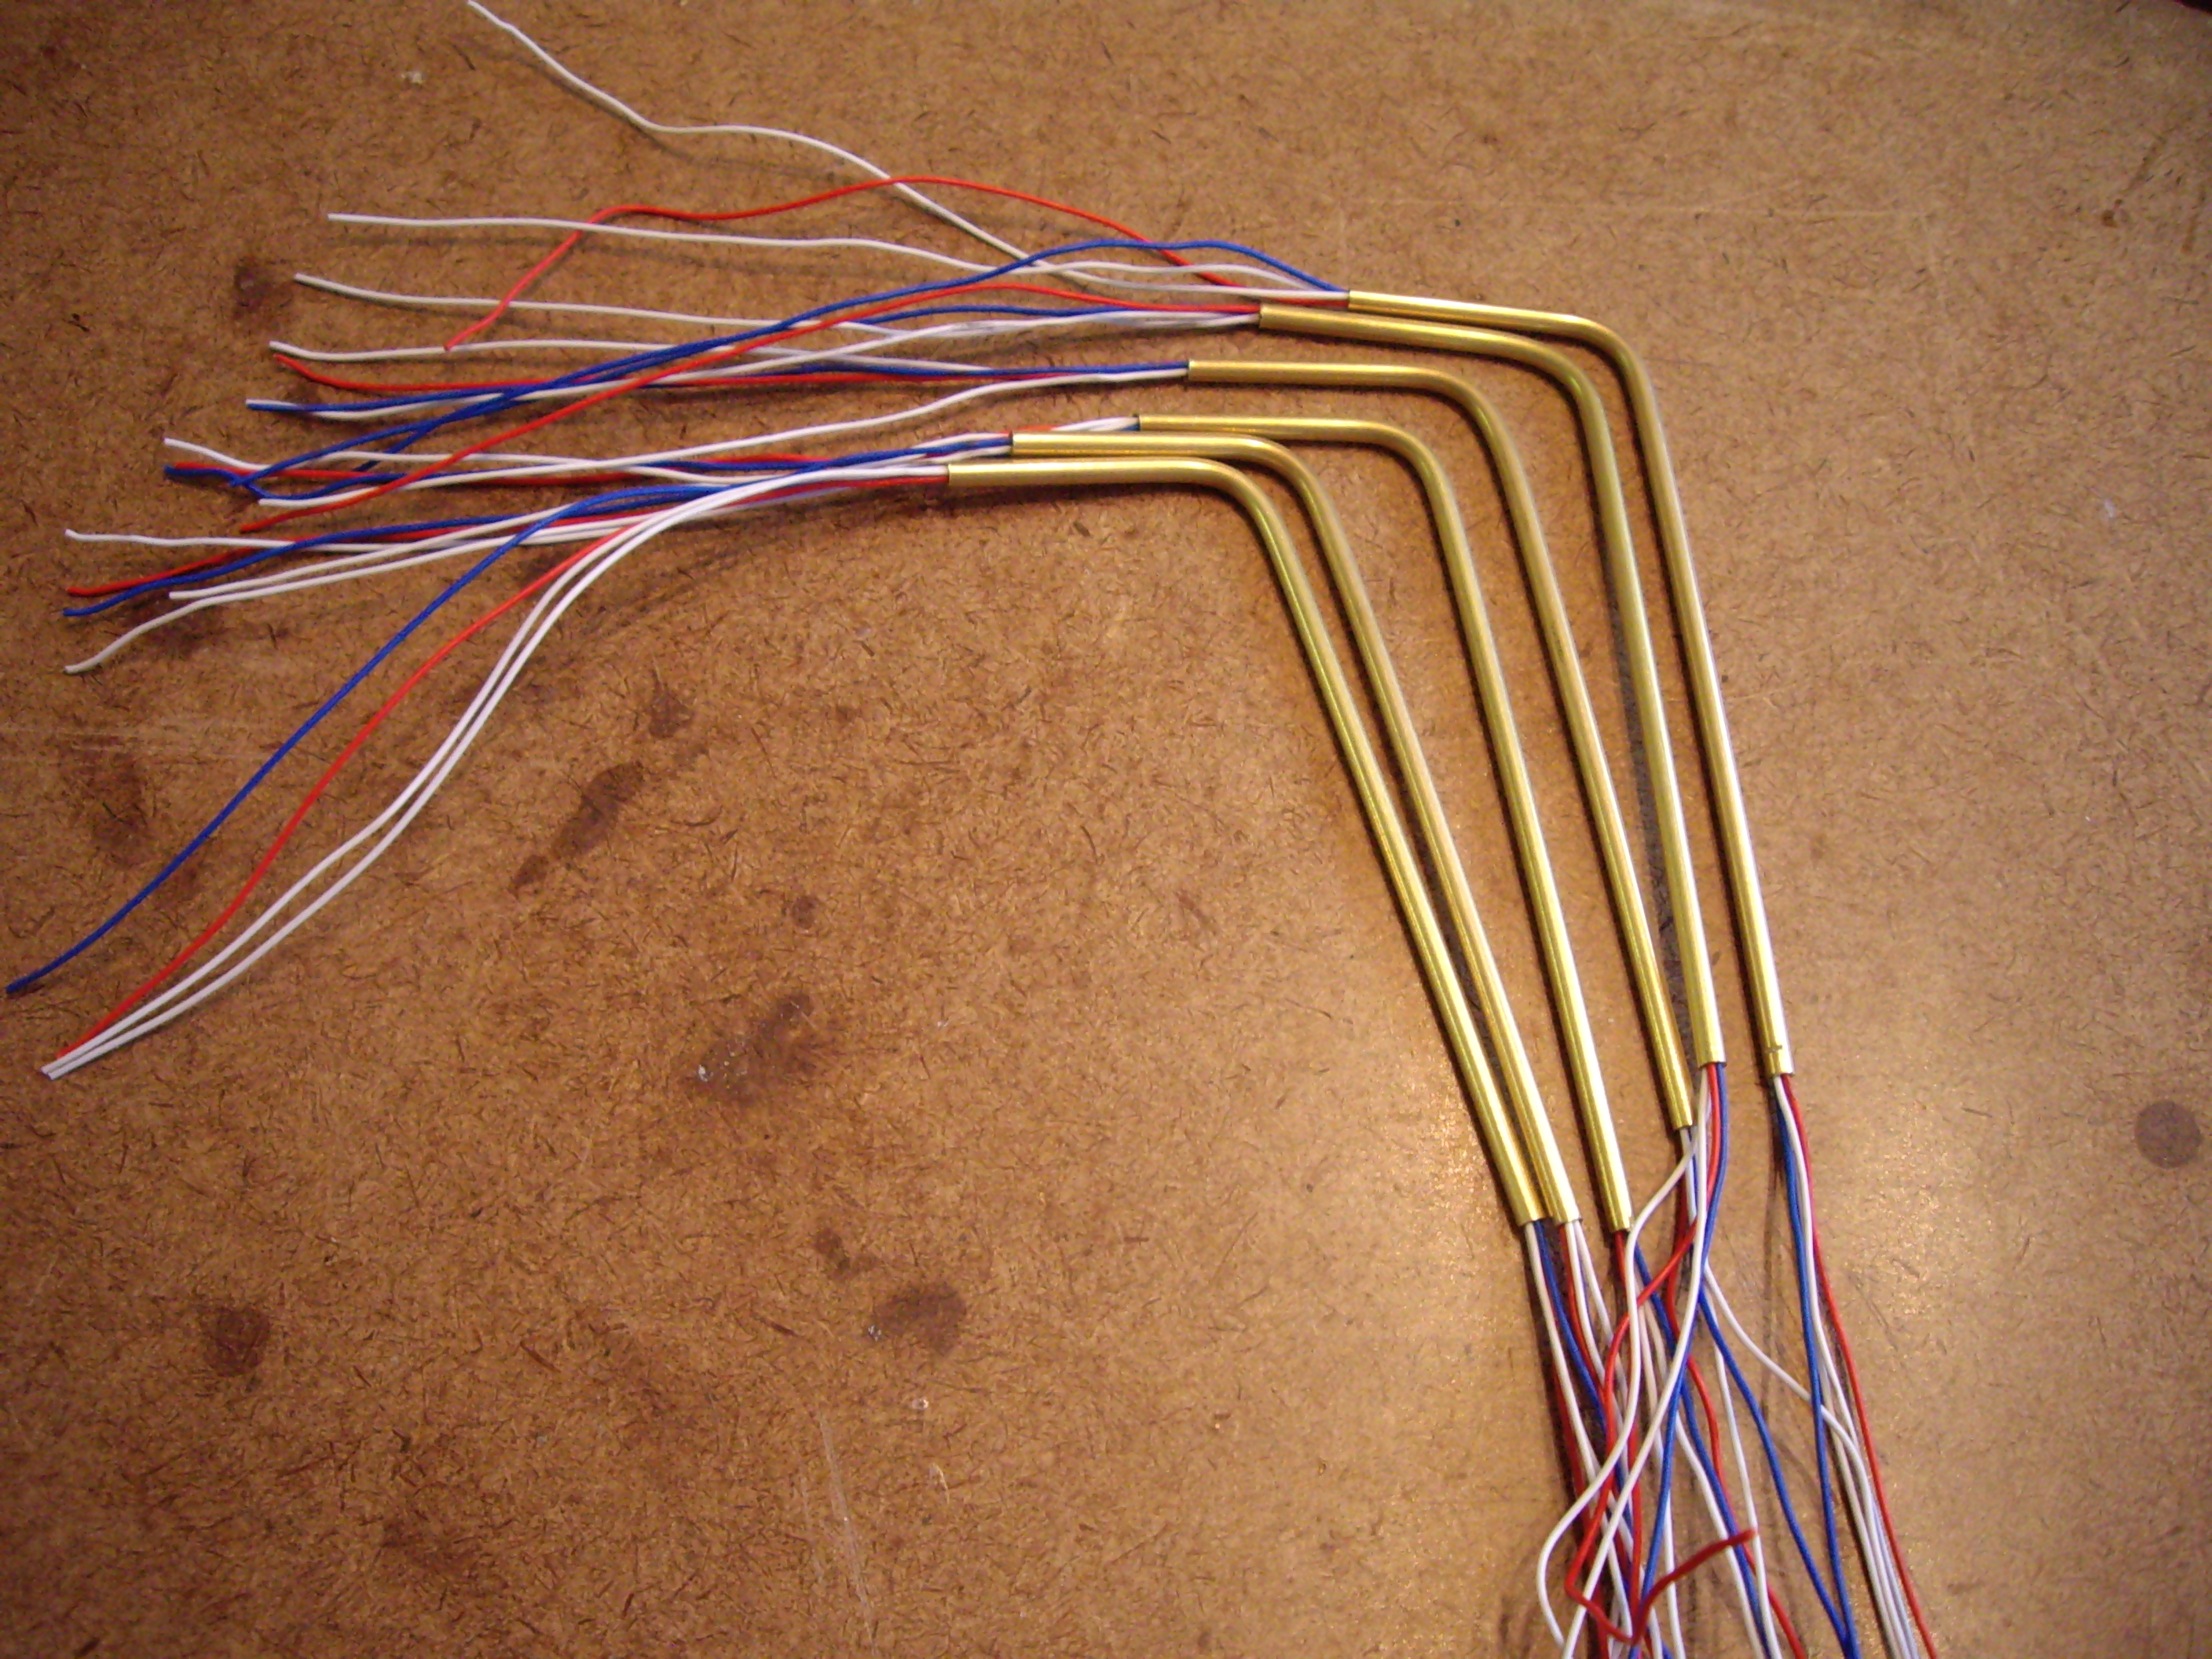
For the light standards, I used 3/32” diameter copper tubing which I cut
into 4” sections. I cut the sections at 4” so I had extra length to insert
into the pilot holes in my layout when it comes to installing these. I
needed to thread 4 wire leads through each so the wires needed to be quite
thin. I found an old computer hard drive ATA cable, which is comprised of
several dozen very thin insulated wires. I then threaded 4 wires through
each copper tube, one for each colour bulb (+) and a common ground (-).
There were only 3 colours of wire however (red, blue, and white), so I used
a second white wire that I marked with a black sharpie on both ends so I
could keep track of which wire was what.
Once the wire leads were threaded through each copper tube, I bent the top
of each tube to an almost 90 degree angle about 1” from the one end. I bent
the curve over a thick marker container to keep the curve uniform and round.
It’s also very important to make sure that the wire leads are preinstalled
in the copper tubes, as the tube needs the internal support when bending.
Without the wire leads inside, the copper tube will kink. Running the thin
wire leads through the tube after it's bent is also near impossible.
By this time the paint on the front of the face plates had dried and it was
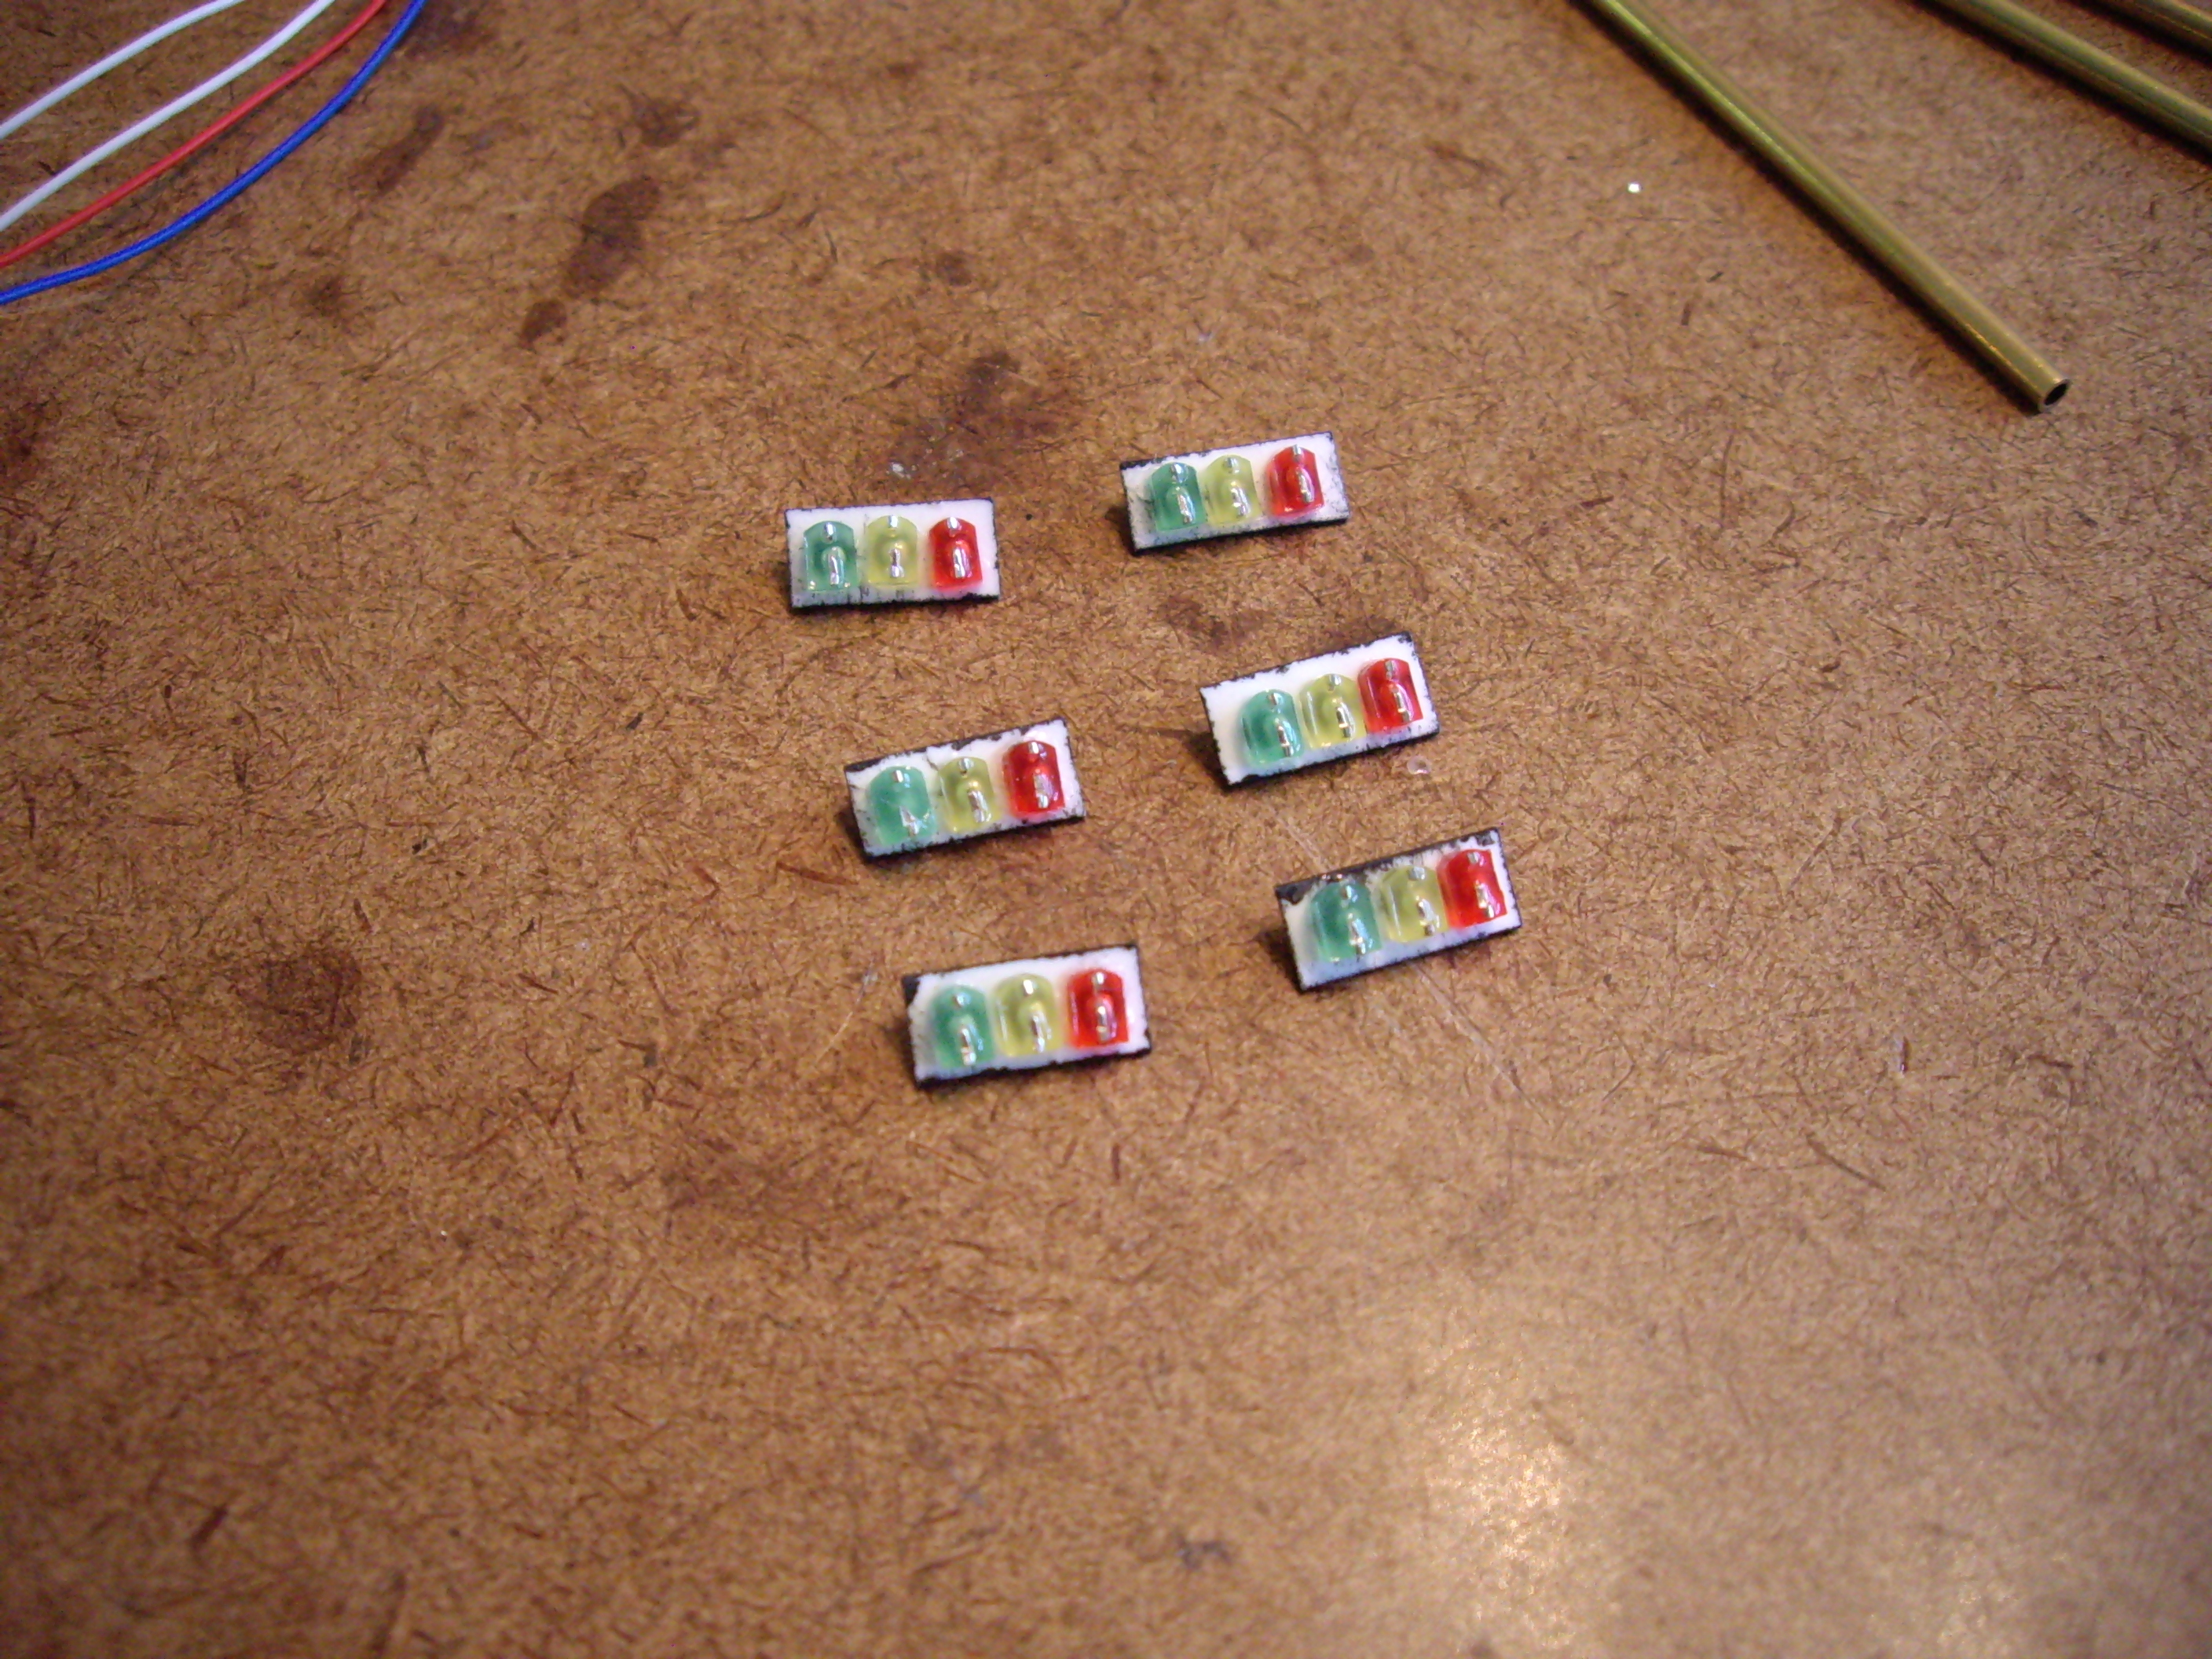
time to install the LED lights. I first cut off the long connectors to each
LED with flush cutters, leaving only a small portion protruding from the
back of each LED. I then glued each LED to the back of the face plates,
making sure the anode (+) connection on each LED was on the top position.
You can distinguish what side is the anode connection on most LED bulbs from
the curved profile on the base of the LED. The cathode (-) side is flat and
squared off and the actual connection lead itself is usually shorter than
the anode.
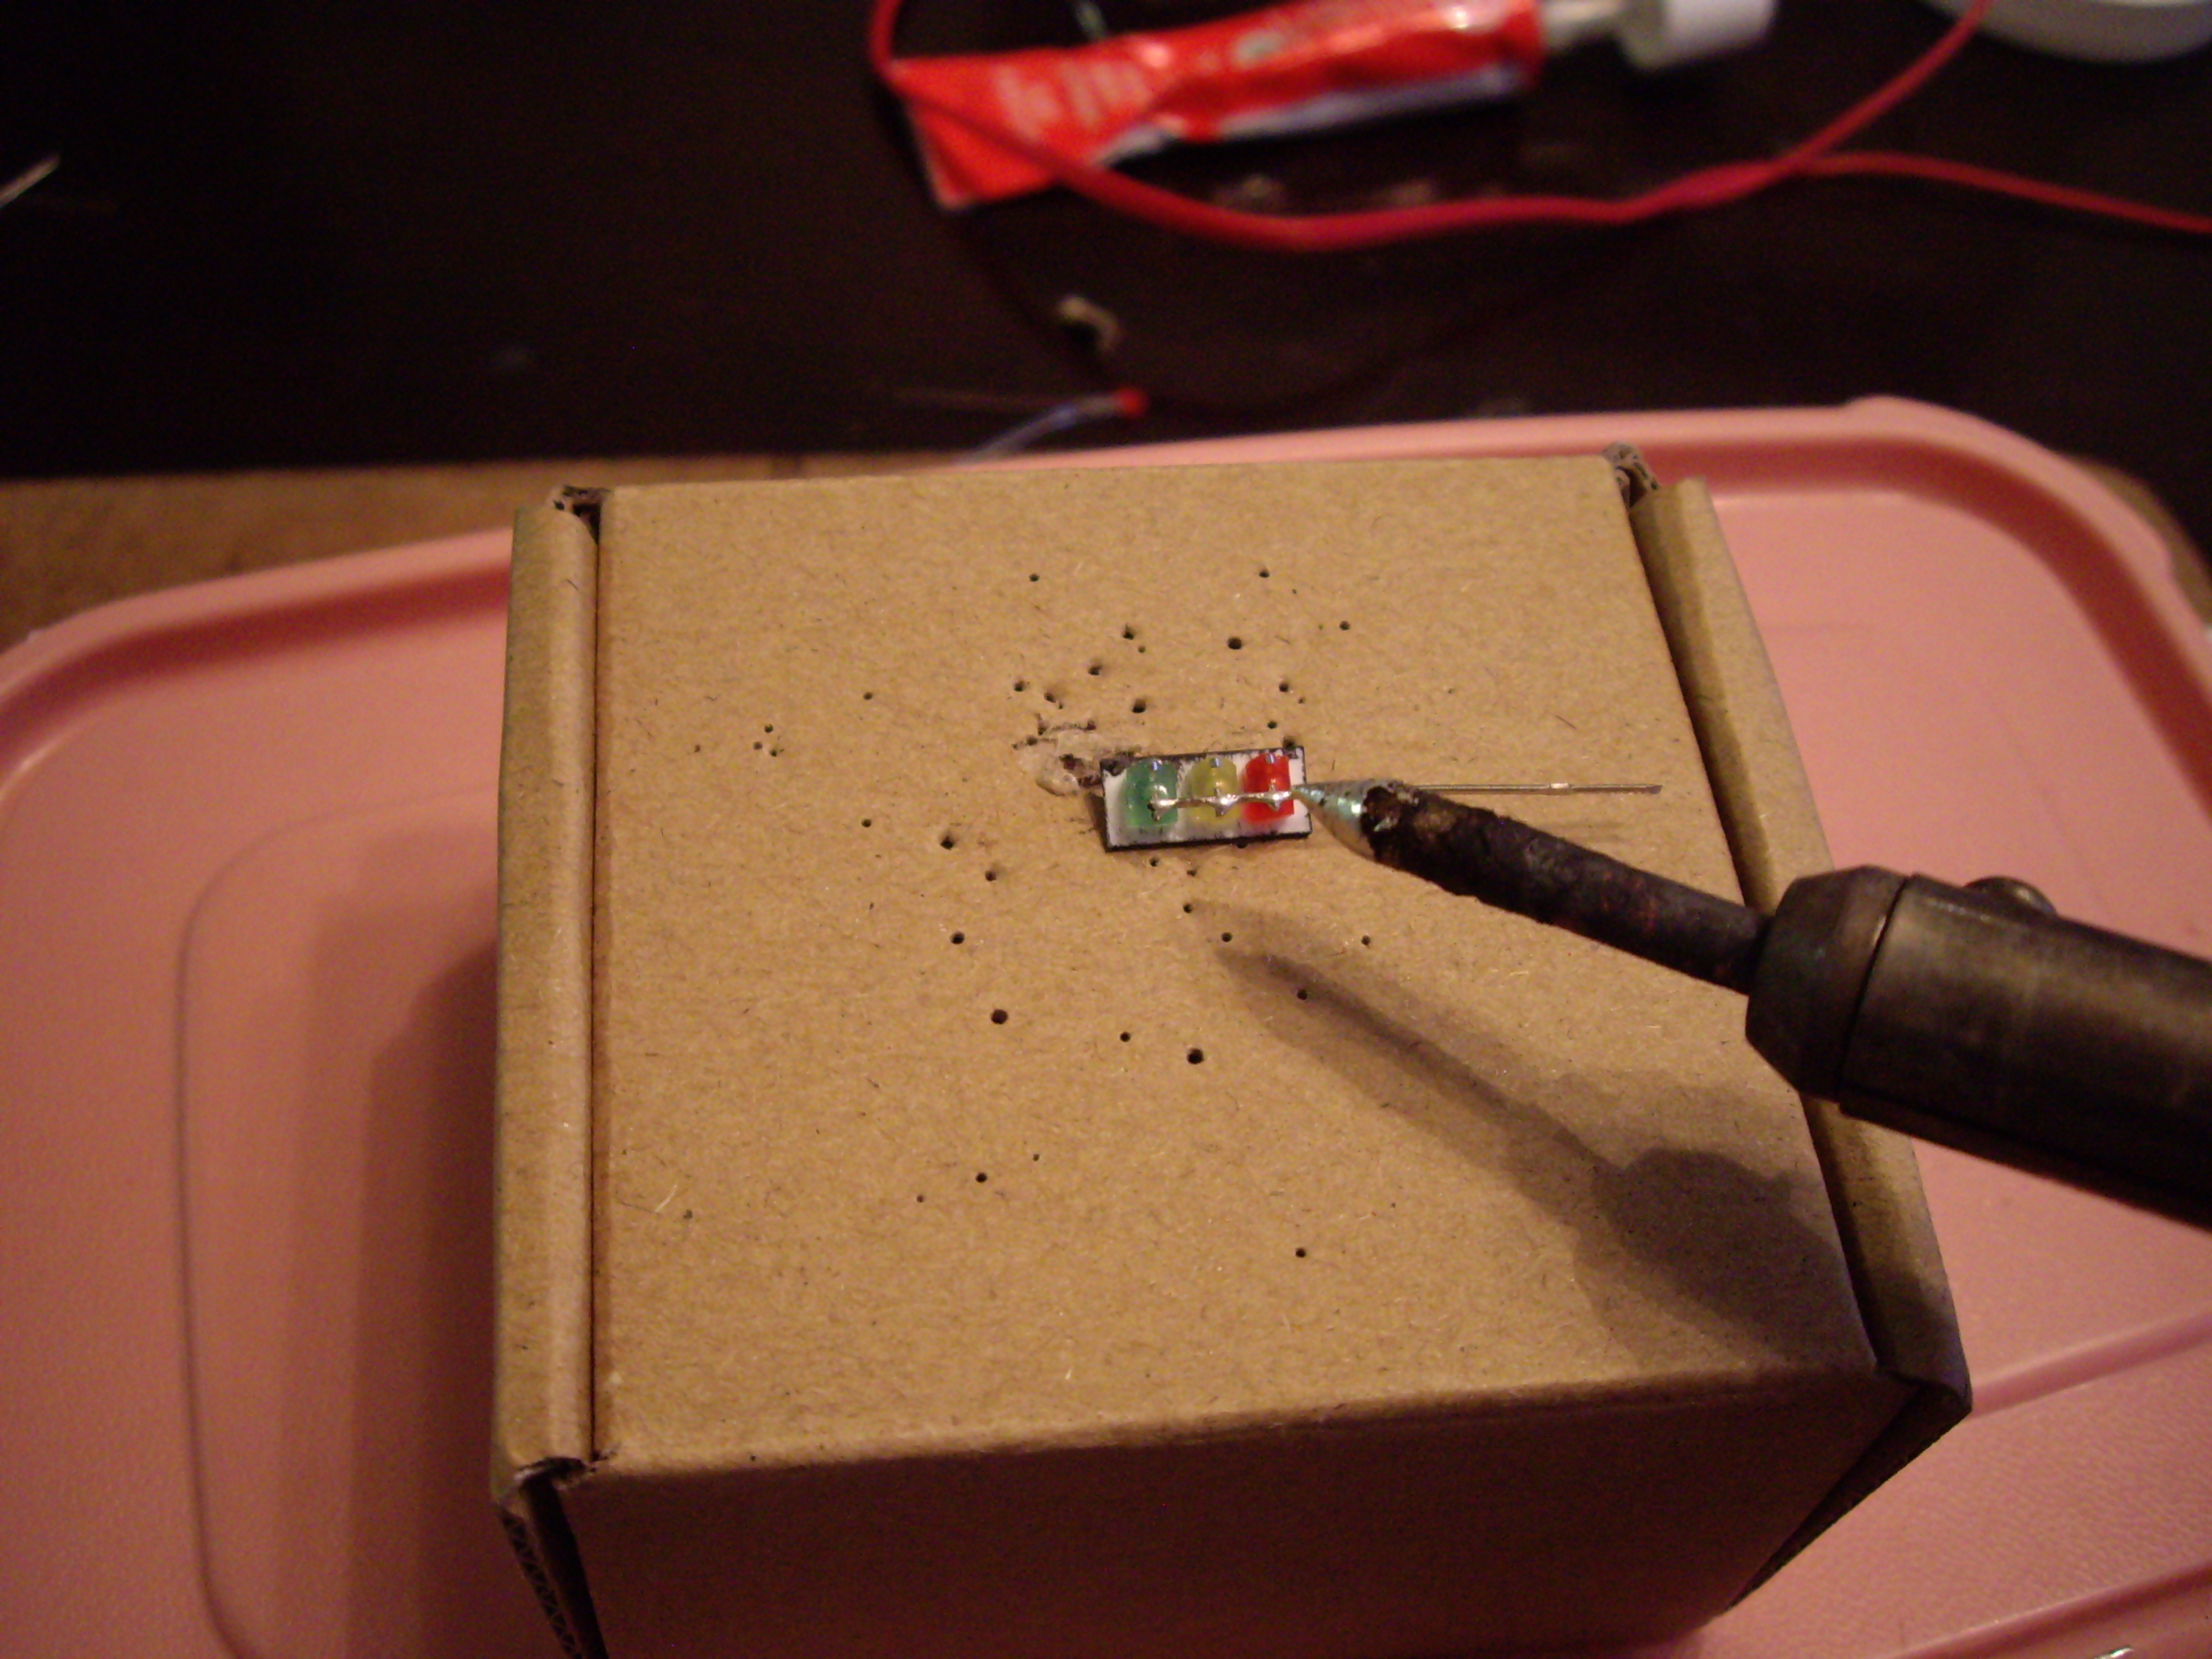
Now for the fun part; soldering the connections to the LED lights. I used a
small cardboard box which I cut a notch into for the front of the face plate
to fit into for support. For the common (-) connection, I used one of the
scrap metal LED leads I had removed prior. I spanned it across all 3 LED
bulbs and soldered it to each cathode (-) connection.
For the controlled (+) connections, I carefully soldered each wire lead
from the copper tube supports to the anode on each LED. I soldered the red
wire to the red LED, the white wire to the yellow, and the blue one to the
greed LED. The other white wire, which I previously marked with a black
sharpie, was soldered to one end of the common connection i made in the
previous step. When soldering the wires, I made a point of positioning each
wire so it would easily exit off to one side of the traffic light. This made
the back of each street light look a lot less cluttered and easy to work
with.
Once all connections were made, I gently pulled the wire leads at the base
of the copper tube supports, slowly bringing each traffic light closer to
the copper post. After I had positioned each traffic light right up against
the copper posts, I adjusted each light so it was positioned level to the
ground when positioned upright. The wires provided enough rigidity that no
glue was required to fasten the lights to the copper posts. I then painted
the back side of each light, including the connections and face plate, with
3-5 coats of black enamel paint, making sure I put on enough coats that no
light was visible from the back of the traffic lights when lit.
The final step was to paint the copper support columns an aluminum colour,
for which I used Humbrol metallic aluminum enamel. With the traffic lights
now complete, they only now need to be installed and connected to a traffic
light controller on my layout. I am currently exploring a couple of options
for controllers, including building my own. That will all however be in my
Traffic Lights – Part II post, which will hopefully be up sometime this
summer. For now, I will return back to my current task of building more
trees.


6 comments
Cool Job!:)
ReplyDeleteI used the same technique, but used decoder wire for the three positive leads and then soldered the common lead to the 3/32" tubing and then soldered a lead at the bottom to complete the circuit. This permits using the " heavier" wire and provides a bit better support for the light head to the post.
ReplyDeleteMalayalam Medium Kerala SSLC 10th Class Model Paper 2022 Keral 10th previous year Sample Papers 2022 Malayalam medium pdf free download is students essential for SSLC 2022 Examination Prepare. Kerala STD-10 Model Paper 2022 Kerala State SSLC Model Papers 2022 kerala SSLC sample Model Paper 2022 English medium and previous years Model Papers for upcoming examinations in 2022.
ReplyDelete
ReplyDeleteRajasthan State Text Book Board Every Year Published and Distribution in Elementary School Textbook for 1st, 2nd, 3rd, 4th, 5th Class Various Gujarati, Hindi, English, Maths, EVS Subject Book, Every Year Rajasthan State Wise Primary School newly Join More Than 5 Laks of Students, RSCERT 4th Class Textbook Rajasthan Board 1st, 2nd, 3rd, 4th, 5th Class Students Strength in More Then 50 laks of Students Attended in Elementary School Level Education, Rajasthan Elementary School Every Year Academic Year Close in Month of April, Rajasthan Elementary School Academic Year Start in Month of June.
TN 1st, 2nd, 3rd, 4th, 5th Last Year Exam Model Paper 2023 has been Upload by Tamil Nadu Department Of Government Examinations, Chennai only . TN SCERT has officially Announced Question Paper for All Subjects. Also, the Marking Scheme and Blueprint for each Paper is Available this web portal. Tamil Nadu 3rd Class Question Paper TN 1st, 2nd, 3rd, 4th, 5th Solved Question Paper 2023 are a helpful Resource for TN 1st, 2nd, 3rd, 4th, 5th Students.Tamil Nadu State Council of Educational Research and Training (TN SCERT) is Going to Conduct 1st, 2nd, 3rd, 4th, 5th Examination 2023 Very Soon, TN SCERT Every year 1st, 2nd, 3rd, 4th, 5th Exam Conducted Month of March, this 1st, 2nd, 3rd, 4th, 5th Exam Every Year 13 laks of Students Appeared, TN SCERT Already Announce 1st, 2nd, 3rd, 4th, 5th Examination 2023 Time Table Pdf Official Website.
ReplyDeleteI really like your content and information. I was looking for information related to street lights. You provide satisfactory information. If anyone is looking street light pole So don't wait & visit there.
ReplyDelete