Layout Scenery Part IV - Bringing It Together

By Ty’s Model Railroad - 11/06/2012 09:08:00 PM

A completed 4 x 8 HO scale model railroad layout set in mountain forest scenery

I find it quite amazing how fast things sometimes come together. I’ve been working on this project for just under 3 years, and though it’s a ways from being complete, it’s definitely now past the 90% mark. While building a project like this, you constantly wonder what the final result will be. You meticulously plan everything out, trying to achieve a certain look and feel. Even though you have a good idea of the direction you’re heading, you never quite know exactly how everything is going to come together in the end. This is especially true if it’s your first go at building a layout. 

A completed 4 x 8 HO scale model railroad layout and scenery set in a mountain forest scene

Then it happens. That most exhilarating part of model railroading that so many modelers talk about; the part when everything all of a sudden comes together. And what a rewarding moment it is. After all of those long evenings planning, painting, plastering, sanding, nailing, wiring, cutting, and gluing, you finally get to see the results of your efforts. I reached this point with my layout just last week.

A completed Northern Light & Power Co. kit placed beside railroad tracks in an industrial scene

I had previously posted about completing my main-street town scene which took up almost one full half of my layout, so here I will cover the second half of the layout. This includes the turn table and industrial area. The first steps I took here were to prepare my layout for the building structures. I used plaster to build a parking lot behind the turn table which my Cutting Scissor’s Co. and scratch-built garage buildings would sit on. After sanding and leveling the plaster, I painted it with the same coloured paint I used on my roads.

A partially complete HO model railroad layout cluttered with various scenery construction materials

My Pioneer Press (Northern Light & Power Kit) will sit upon a gravel lot so I used sifted sand and applied it directly to the plywood base using diluted white glue. At the same time, I started the process of adding the same sifted sand to the turn table area and track. I ended up having to lay the sand down quite thick in this area to make it level with the tracks. I used a pipette to first wet the sand with isopropyl alcohol then used a second pipette to apply diluted white glue. After drying overnight, I noticed that some large cracks had developed in the sand. This required reapplying more sand to fill in the cracks and sealing with white glue.

A gravel parking lot next to a plaster road being constructed with sifted dirt

Before positioning the structures on the layout, I drilled holes through the bench work for the power leads to pass through for lighting. I also drilled holes and installed the remainder of the street lights along the roadways. I carefully positioned each building onto its intended position. The leads to both the buildings and street lights were then wired to the electrical system beneath the benchwork. 

Cutting Scissors Co. kit and scratch built garage across from rail yard and scratch built chain link fence

Fencing was added next. I used a section of fence from an Atlas White Picket Fence kit that I painted brown in front of the Pioneer Press building. For the turntable yard, I surrounded it with custom built chain link fencing (explained in my
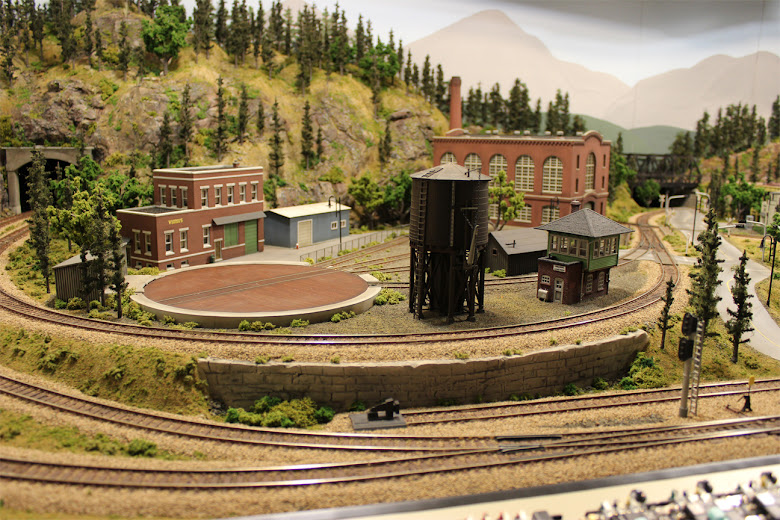
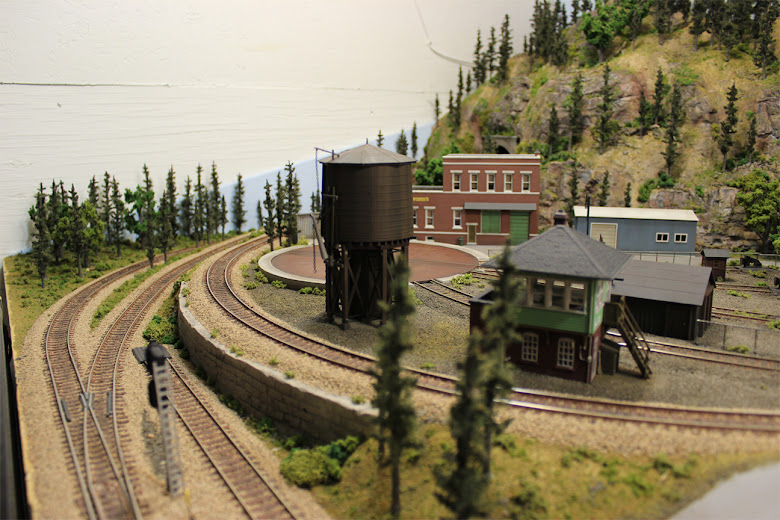
Layout Scenery Part III - Downtown post). The rest of my structures were added at this point, including the signal tower, water tower, freight station, and 2 small shed structures made from spare pieces.

Completed industrial scene including rail yard, water tower, turn table, signal tower and various model building kits

The switch machine controlling the turnout into my turntable has been an eyesore since it was first installed. I wasn’t able to install an under-table machine here like I did on my other turnouts so I had to find a way to cover the mechanism. To do this, I built a small platform out of polystyrene which I then painted and weathered to look like concrete. I added small railings made of brass rod. The platform sits on top of the switch machine, conveniently hiding it from view. Now you might ask, “What exactly this platform is for?” Well, I’m not exactly sure. But one thing I can tell you is that it looks a whole lot more believable then the big black ugly switch machine. It blends in well with the rest of the scenery and goes mostly unnoticed. Mission accomplished!

A custom built styrene platform to cover an unsightly Atlas trackside switch machine

Vegetation and greenery where added next. This included adding ground cover, bushes, shrubs, and trees to the remainder if the layout and to blend separate scenes into the surrounding terrain. I still have a few small places to touch up and a few foliage elements to add, such as little grass tufts, but overall the main scenery elements are complete.

Three curved railroad tracks emerge from a single and double tunnel portal in a mountain forest scene

Ballasting the remainder of my track was the last major step in completing the track work. I didn’t have much left to do at this point as I ballasted most of my track section by section over the last year. I did however have to take some extra time and precaution when ballasting all of the turnouts at the front of my layout. I had to make sure that I didn’t get any glue onto the turnout’s moving parts, so I used a fine paintbrush to apply small amounts of glue around the ties. After carefully adding the ballast, I vacuumed up the excess and ensured the turnouts moved smoothly. I finished the track by weathering it with black powder pastels. 

Currently I am working on completing some nighttime lighting effects that represent a moonlit sky, which I should have complete in the next few days. I am also currently on the hunt for vehicles, figures, and other scenic details needed to complete the finer details of my layout. Street signs are also on my current to-do list.

Completed industrial scene made up of a Cutting Scissors Co kit and scratch built garage next to an Atlas turn table

Completed industrial scene including rail yard, water tower, turn table, signal tower and various model building kits

Completed industrial scene including rail yard, water tower, turn table, signal tower and various model building kits

Railroad track and turnout running alongside a plaster road with grade crossings

Completed Atlas Water Tower and Signal Tower kits installed in a rail yard in a model railroad industrial scene

A completed 4 x 8 HO scale model railroad layout set in a mountain forest scene with a control panel

A railyard scene surrounded by several lines of railroad track and a plaster retaining wall

Custom built model railroad control panel with mountain forest and industrial scenery in the background

A plaster road crossing a railroad turnout in front of a Northern Light & Power kit with downtown scene in the background


  • Share:

You Might Also Like

15 comments

  1. Really like the photo of the diamond, grade crossing, switch and stand and crossbucks. Just a nice view. Am really enjoying your blog. Neal

    ReplyDelete
  2. Wow! It looks amazing, you've done an excellent job capturing the details.

    ReplyDelete
  3. Fantastic layout, Tyler. Very nice job.
    Cheers, Paul.

    ReplyDelete
  4. Outstanding and inspiring. I am just starting to get my feet wet - more like finding a hobby that I like and can share its excitement with my son - but I can see the complexity and admire your work. The video was also great!!!

    ReplyDelete
  5. Great web site, thanks for sharing the journey.

    ReplyDelete
  6. Great Detail, so this is all in a 4 X 8 size ? Can you provide Elevations for the various tracks

    Tom

    ReplyDelete
    Replies
    1. Hey Tom, sorry about the late reply. Yes, this is all on a 4x8 standard sheet of plywood. Could you send me an email (see the "contact me" link above), and I can send you some elevations. Thanks.

      Delete
  7. Amazing work, VERY nice attention to detail!

    ReplyDelete
  8. Hi Tyler,
    I'm a little late to the party, but congratulations on a great layout.
    Could you also please send me the elevations
    Thanks in advance.
    Hans Viergever

    ReplyDelete
  9. Great work, I am building a British GWR layout in my garage, and I know what you mean about it coming all together, great feeling.

    ReplyDelete
  10. Tripura Board 12th Class Latest and Last Year Exam Study Material for Syllabus, Question Paper etc, Hindi, English Medium Pdf Format, Tripura HS Question Paper 2021 Students Download Tripura Board 12th Model Paper 2021 at Official Website Only.

    ReplyDelete
  11. Now that is a super nice layout, I have had trains all my life, but never a permanent layout and at 76 years I finally have the place to build one, I hope you are still enjoying this one.
    Now if I can only remember where the garage is. Ha!Ha!

    ReplyDelete
  12. NCERT Publish Text Book for Class 1,2, 3, 4, 5, 6, 7, 8, 9, 10 Academic Year 2023 for Primary and High School (Class 1) Students Education Purpose, National Council of Educational Research and Training (NCERT) is an autonomous organisation of the Government of India, NCERT 1st Class Book NCERT Textbooks Provide Prescribed Courses, National Council of Education Board are important for most of the Final Examinations because of High Quality Study Material and resources, NCERT Class 1,2, 3, 4, 5, 6, 7, 8, 9, 10 Books 2023 for English, Hindi, Urdu Medium Wise.

    ReplyDelete